
I created this pattern as a funny addition to the 2020 quarantine aesthetic. In these annoying times, all we have left is to laugh. Add a little comedy to your every day life by making your very own Plague Mask!
This pattern consists of the most basic stitches, so it’s technically beginner friendly. If you think you’ll have lots of questions along the way I’d be happy to answer them! Picking up a new hobby is great for your mental health. Especially if you are making something, because at the end, the final product is like a little victory ♥
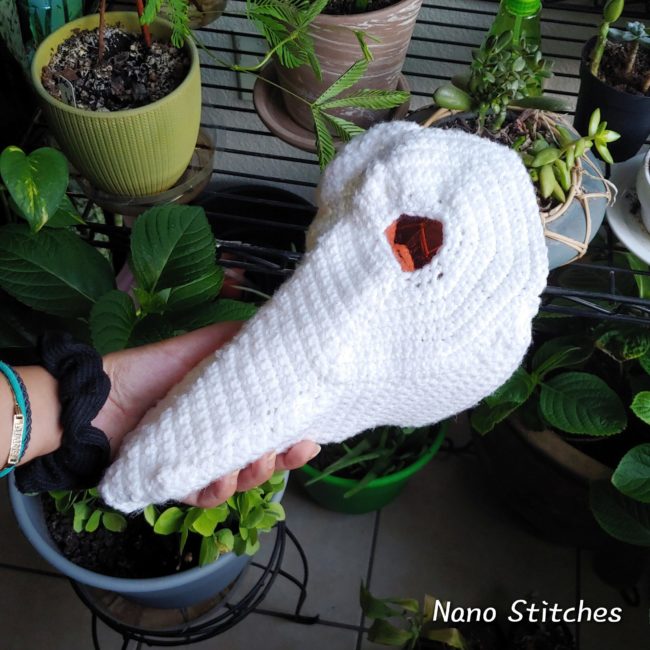
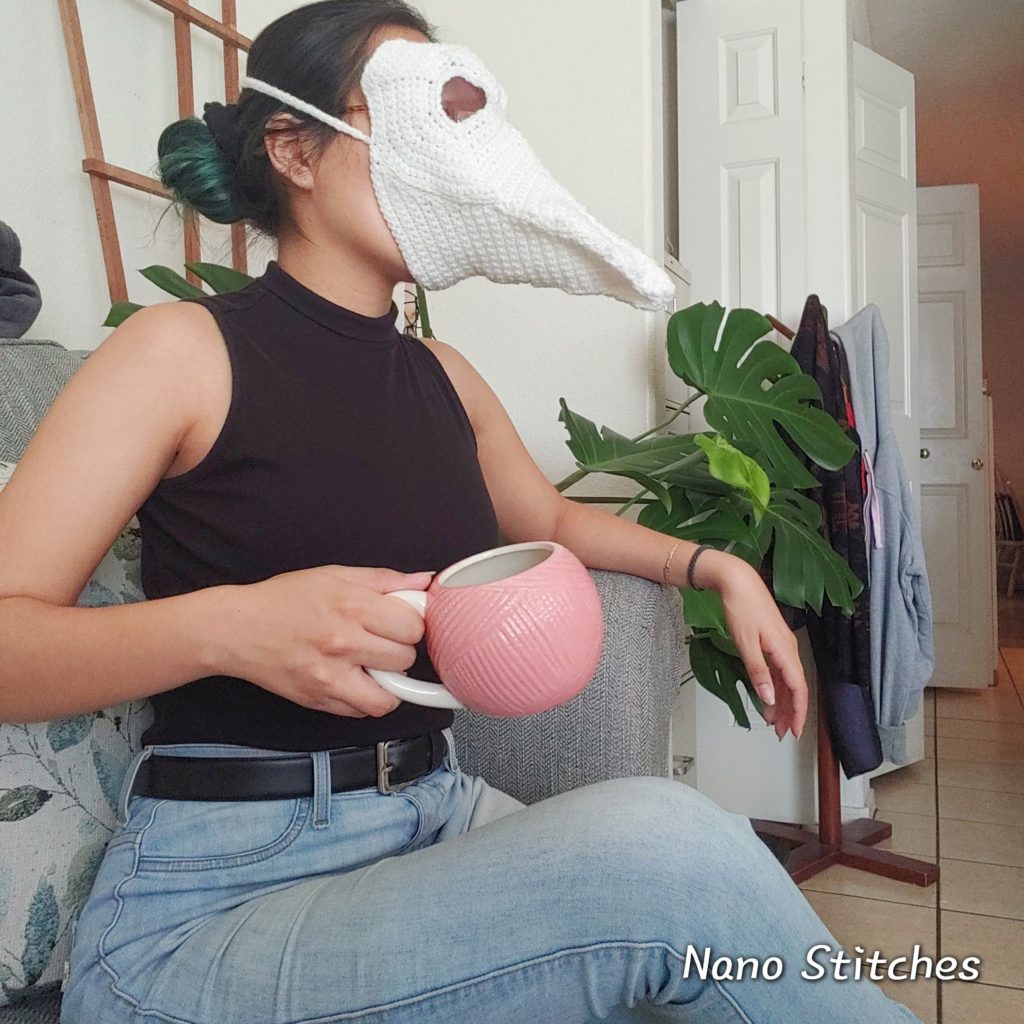
With everyone uploading their face-mask selfies, wouldn’t you like to go the extra mile with a full on Plague Mask?
If you decide to wear this out in public, I HIGHLY recommend that you also wear a disposable mask underneath. The mask may be bulky, but crochet stitches are very porous either way. Also, this won’t make you suffocate. I wear a mask with 3 layers of fabric and 2 filters on the regular, here in Tucson, Arizona where it is usually over 100°F!
The ad-free and printable version of this pattern can be found here.
The definitions for all crochet abbreviations used can be found here.
ABBREVIATIONS (AMERICAN TERMS)
- Ch: Chain
- Sc: Single Crochet
- Sl st: Slip Stitch
- Sc dec: Single crochet Decrease
- (xx): Numbers in bold mean stitch count at the end of each round
Gauge and dimensions:
In a 1 inch by 1 inch square of stitches there should be 4sc and 4 rows of sc.
Materials Needed:
- 4.50mm Crochet Hook
- Medium Weight Yarn (Red Heart Super Saver in White)
- Scissors
- Yarn needle (metal recommended)
- Stitch Marker (improvised markers: paper clip, bobby pin, piece of different color yarn)
- Two sunglass lenses without the frame.
To block the mask:
- Liquid glue
- Water
- A bowl
- Something to prop the mask open, (I used a tupperware lid)
- Brush (optional)
Pattern
PIECE #1
Repeat this piece twice.
- Row 1: Ch 21, sc 20 (20)
- Row 2: Ch 1, sc 17, 1 sc dec (18)
- Row 3: Ch 1, skip 1st stitch, sc 17 (17)
- Row 4: Ch 1, sc 15, 1 sc dec (16)
- Row 5: Ch 1, skip 1st stitch, sc 15 (15)
- Row 6: Ch 1, sc 13, 1 sc dec (14)
- Row 7: Ch 1, skip 1st stitch, sc 13 (13)
- Row 8: Ch 1, sc 11, 1 sc dec (12)
- Row 9: Ch 1, sc 12 (12)
- Row 10: Ch 1, sc 12 (12)
- Row 11: Ch 1, skip 1st stitch, sc 11 (11)
- Row 12: Ch 2, sc 10, 1 sc dec (11)
Sc into the extra chains to make the additional stitches.
- Row 13 – 19: Ch 1 , sc 11, (7 rows) (11)
- Row 20: Ch 2, sc 11 (11)
- Row 21 -24: Ch 1, sc 11 (4 rows) (11)
- Row 25: Ch 1, skip 1st stitch, sc 10 (10)
- Row 26: Ch 2, sc 9, 1 sc dec (10)
- Row 27 and 32: Ch 1, sc 10 (5 rows) (10)
- Row 33: Ch 1, skip the 1st stitch, sc 9 (9)
- Row 34: Ch 2, sc 9 (9)
- Row 35: Ch 1, skip the 1st stitch, sc 8 (8)
- Row 36: Ch 2, sc 9 (9)
- Row 37: Ch 1, skip the 1st stitch, sc 8 (8)
- Row 38: Ch 2, sc 9 (9)
- Row 39: Ch 1, skip the 1st stitch, sc 8 (8). Fasten off and leave a 20 inch long tail for sewing
PIECE #2
Repeat this piece twice.
- Row 1: Ch 8, turn around and sc 7 (7)
- Row 2: Ch 1, 5 sc, 1 sc dec (6)
- Row 3: Ch 1, skip the 1st stitch, sc 5 (5)
- Row 4: Ch 1, 3 sc, 1 sc dec (4)
- Row 5: Ch 1, skip the 1st stitch, sc 3 (3)
- Row 6: Ch 8, sc 8, 1 sc dec (9)
- Row 7: Ch 1, sc 9 (9)
- *[Row 8: Ch 2, sc 10 (10)
- Row 9: Ch 1, skip the 1st stitch, sc 9 (9)]* Repeat Rows 8 and 9 (7) times.
- Row 22: Ch 1, sc 9 (9)
- Row 23: Ch 1, skip the 1st stitch, sc 8 (8)
- Row 24: Ch 2, sc 9 (9)
- Row 25: Ch 1, skip the 1st stitch, sc 8 (8)
- Row 26: Ch 1, sc 8 (8)
- Row 27: Ch 1, skip the 1st stitch, sc 7 (7)
- Row 28: Ch 2, sc 8 (8)
- Row 29: Ch 1, skip the 1st stitch, sc 7 (7)
- Row 30: Ch 1, sc 7 (7)
- Row 31: Ch 1, skip the 1st stitch, sc 6 (6)
- Row 32: Ch 2, sc 7 (7)
- Row 33: Ch 1, skip the 1st stitch, sc 6 (6)
- Row 34: Ch 2, sc 7 (7)
- Row 35: Ch 1, skip the 1st stitch, sc 6 (6)
- Row 36: Ch 1, sc 6 (6)
- Row 37: Ch 1, skip the 1st stitch, sc 5 (5)
- Row 38: Ch 2, sc 4, 1 sc dec (5)
- Row 39: Ch 1, skip the 1st stitch, sc 4 (4)
- Row 40: Ch 1, sc 2, 1 sc dec (3)
- Row 41: Ch 1, skip the 1st stitch, sc 2 (2)
- Row 42: Ch 1, 1 sc dec (1). Fasten off and leave a 20 inch long tail for sewing
PIECE #3
Repeat this piece twice.
- Row 1: Ch 17, (Sc 3, 1 sc inc) X4 (20)
- Row 2: Ch 1, (1 sc inc, 4 sc) X4 (24)
- Row 3: Ch 1, (Sc 5, 1 sc inc) X4 (28)
- Row 4: Ch 1, (1 sc inc, 6 sc) X4 (32)
- Row 5: Ch 1, (Sc 7, 1 sc inc) X4 (36)
- Row 6: Ch 1, (1 sc inc, 8 sc) X4 (40)
- Row 7: Ch 1, (Sc 9, 1 sc inc) X4 (44)
- Row 8: Ch 1, (1 sc inc, 10 sc) X4 (48)
- Row 9: Ch 1, (Sc 11, 1 sc inc) X4 (52). Fasten off and leave a 20 inch long tail for sewing

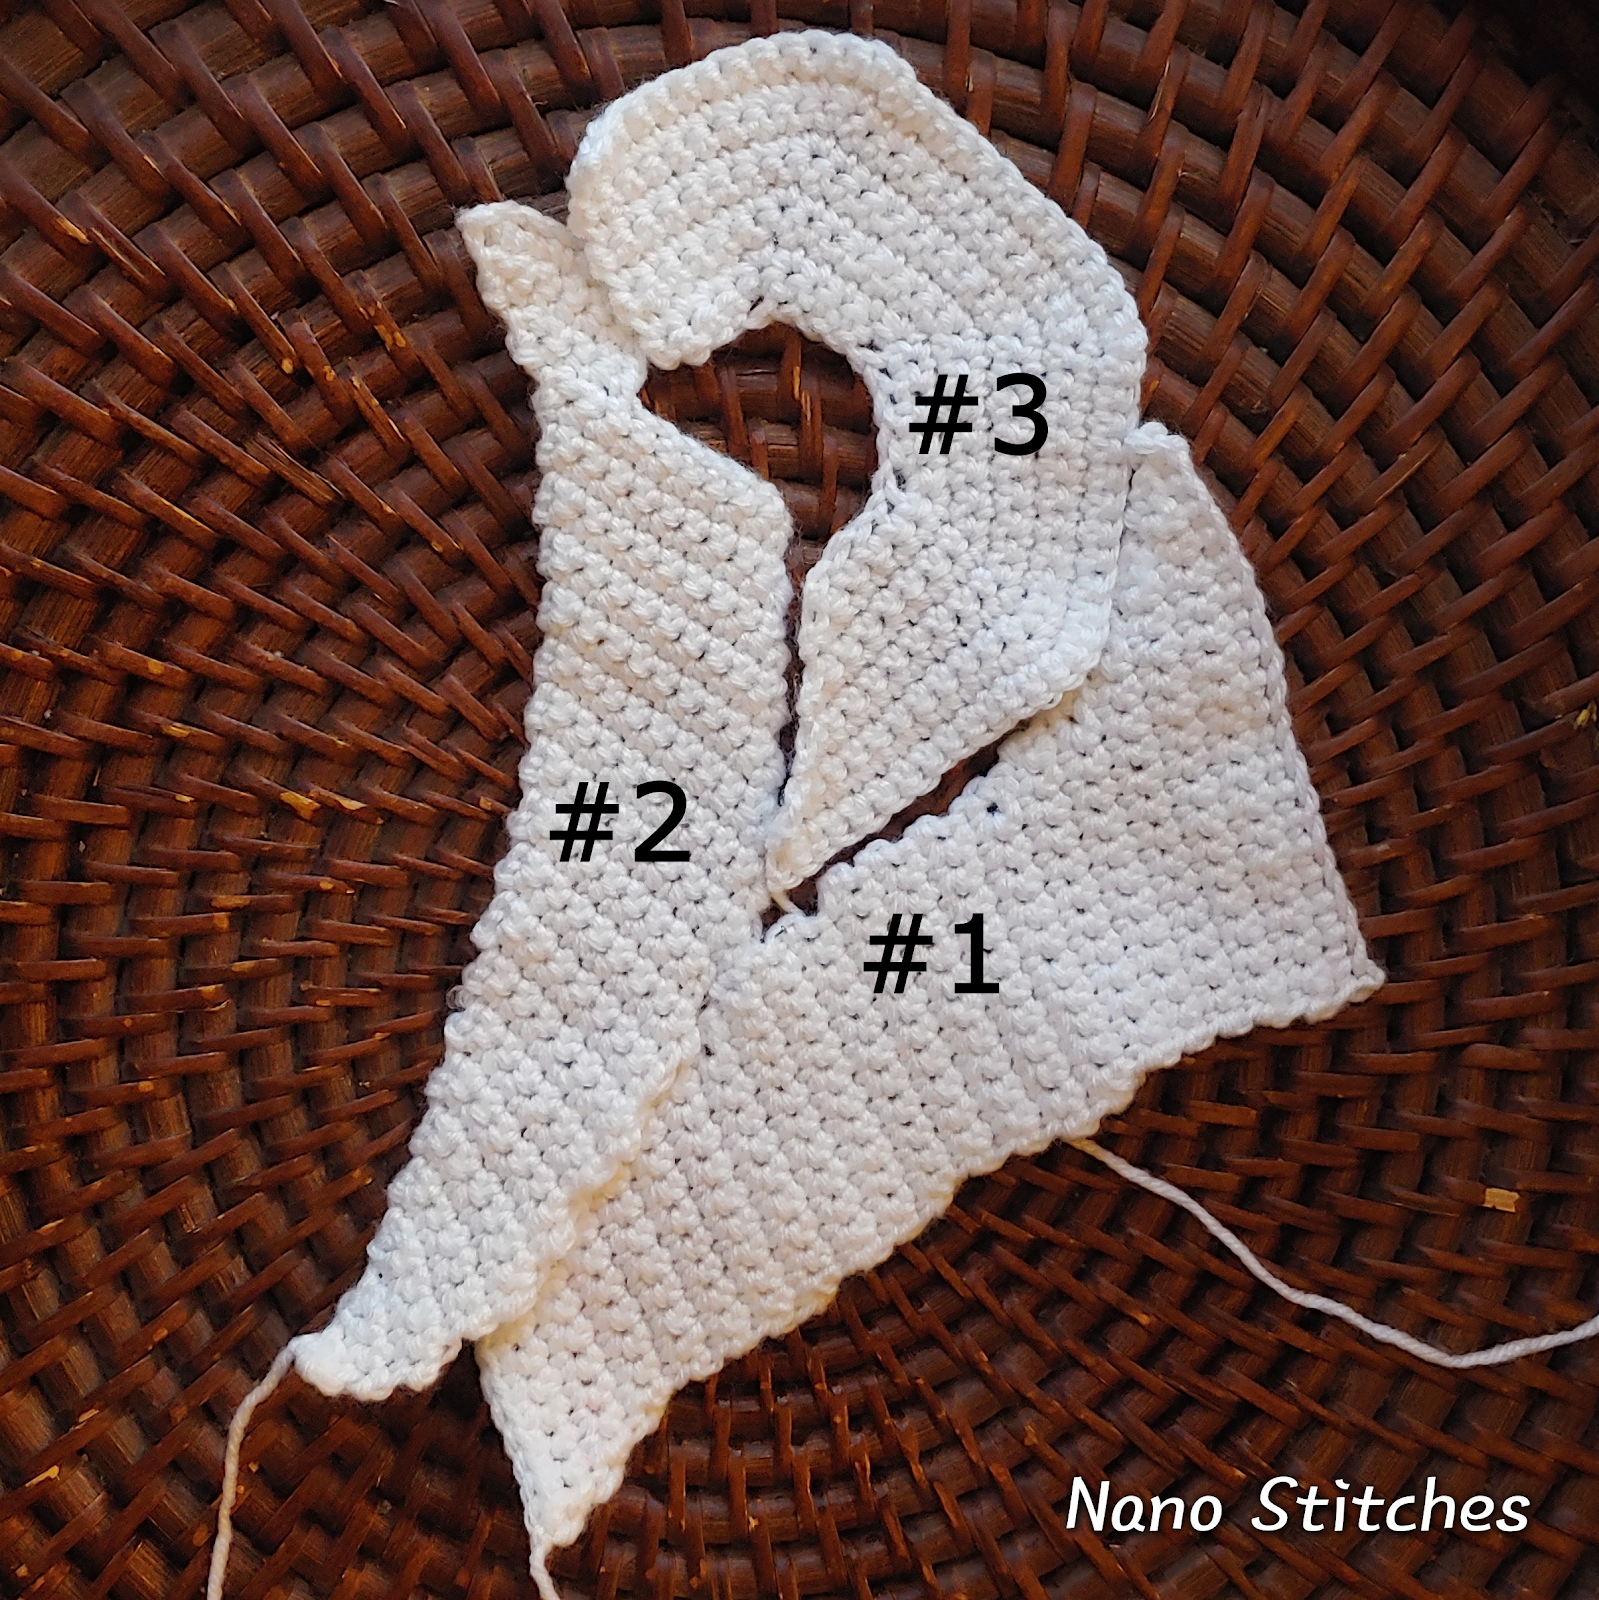
ASSEMBLY
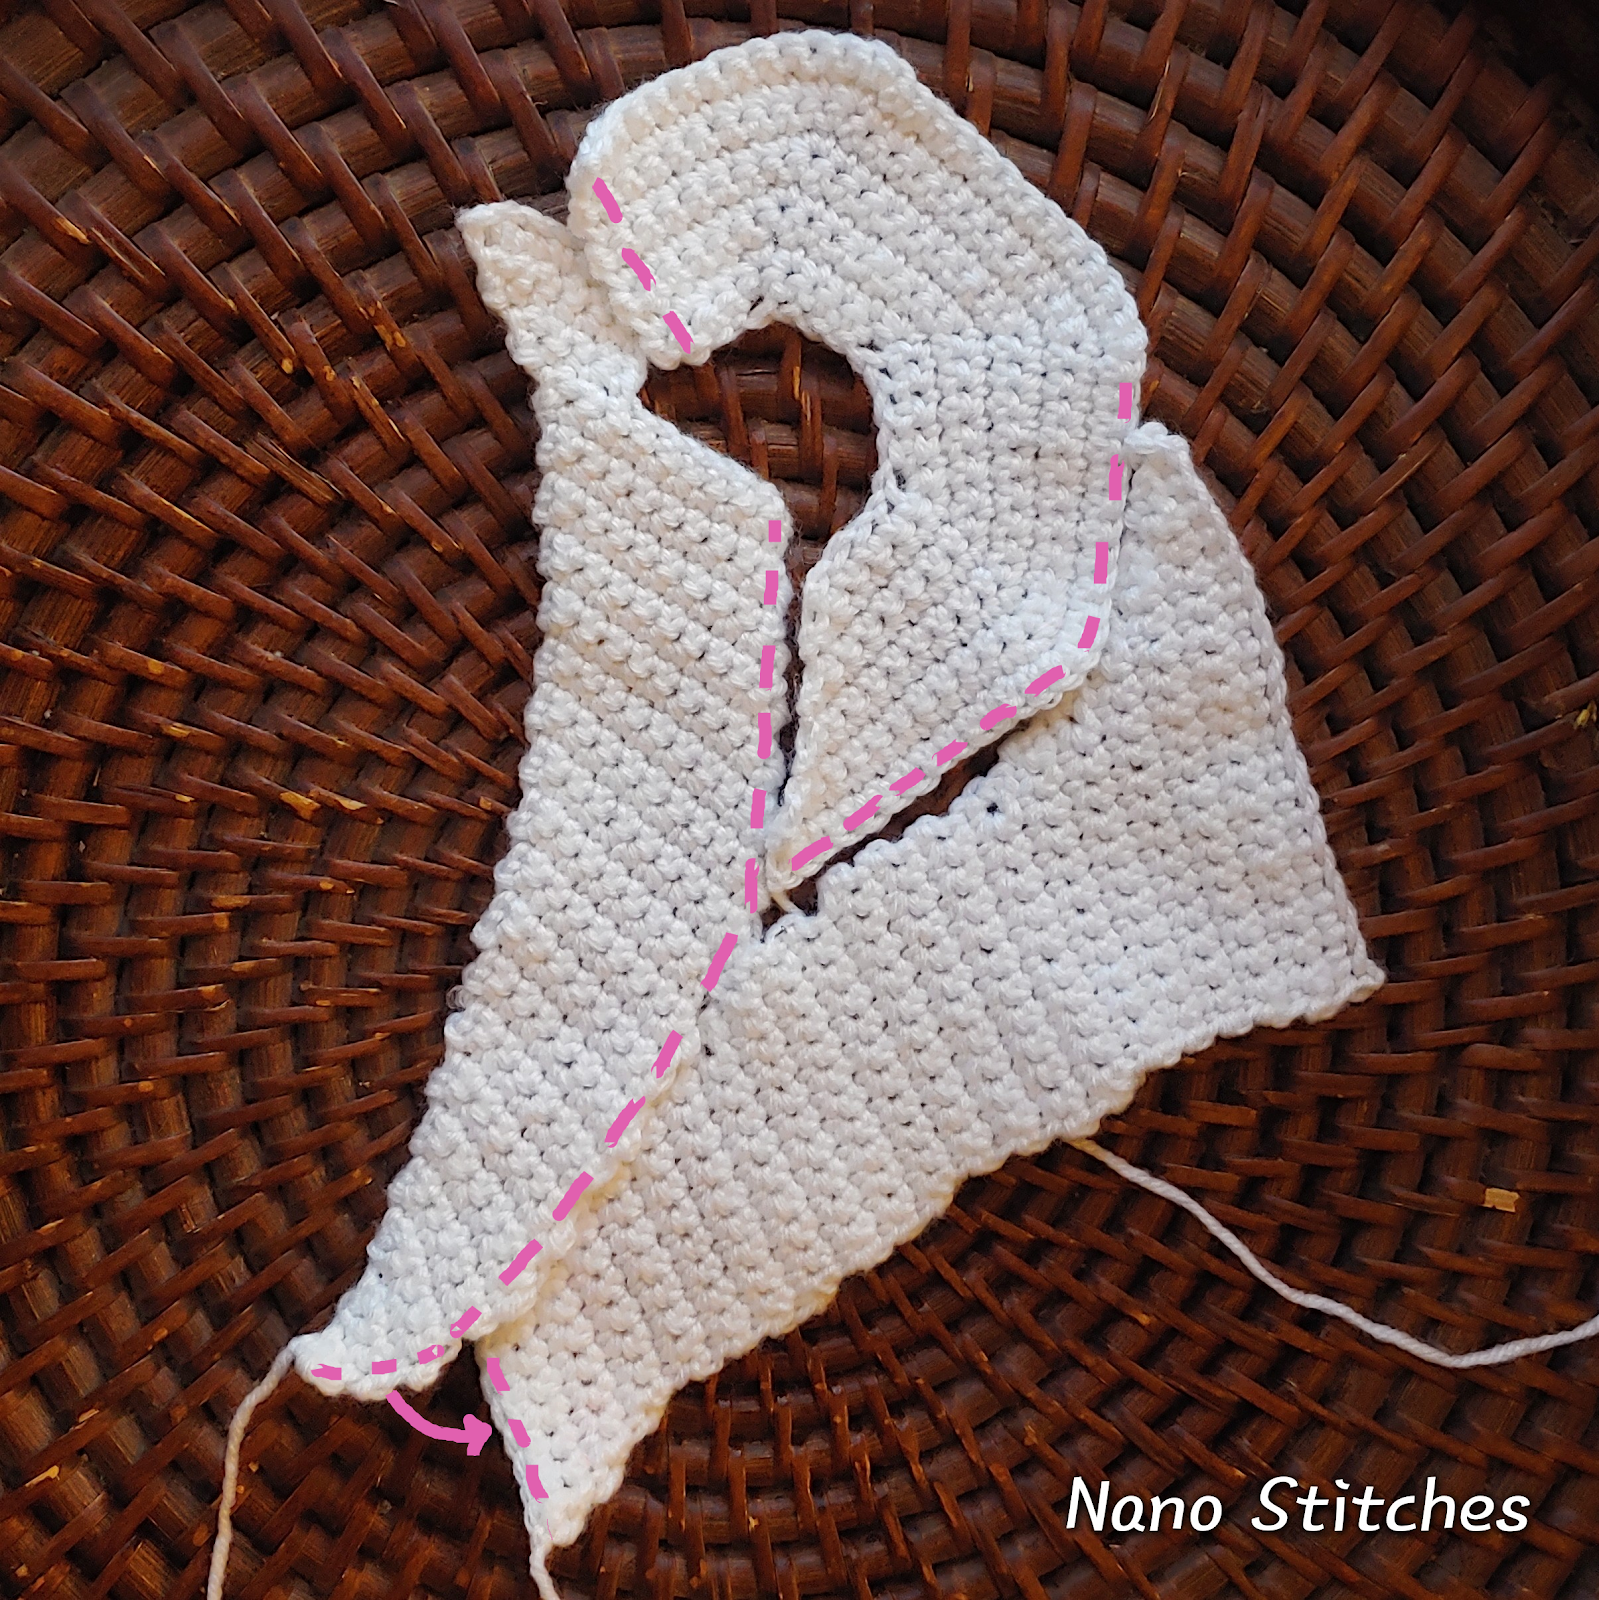
Align pieces #1, #2, and #3 as pictured and pin the pieces in place. Align the bottom corner of piece #3 onto row 19 of piece #1 and row 16 of piece #2. This corner is very important for the shape of the mask. Once you like the alignment, sew the pieces together along the dotted pink lines shown below using the yarn tails. This forms half of the mask, repeat this process for the other set of pieces.
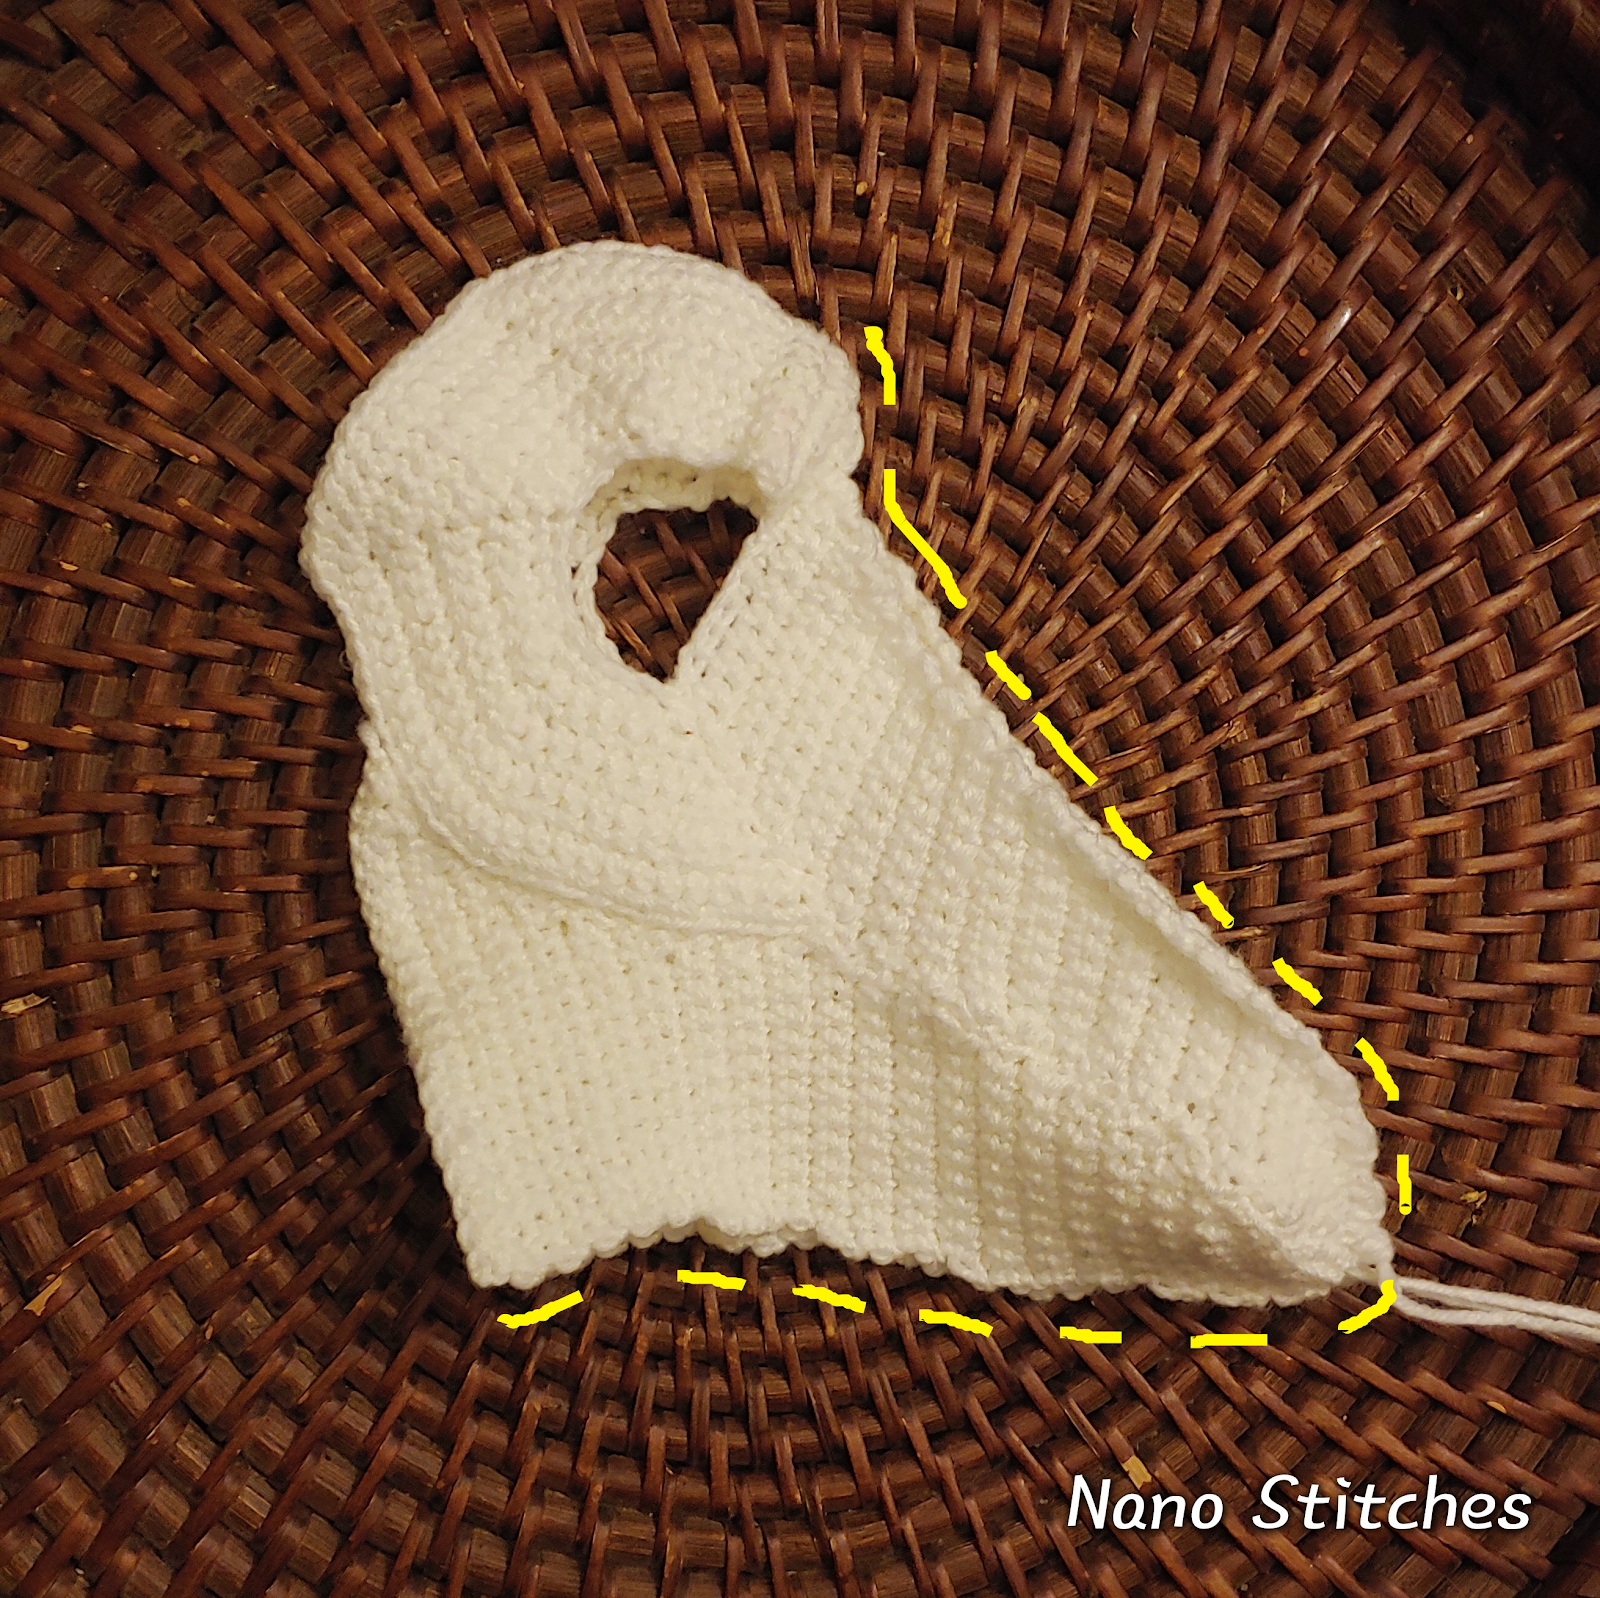
Align both of the halves as pictured and sew them together along the yellow dotted line:

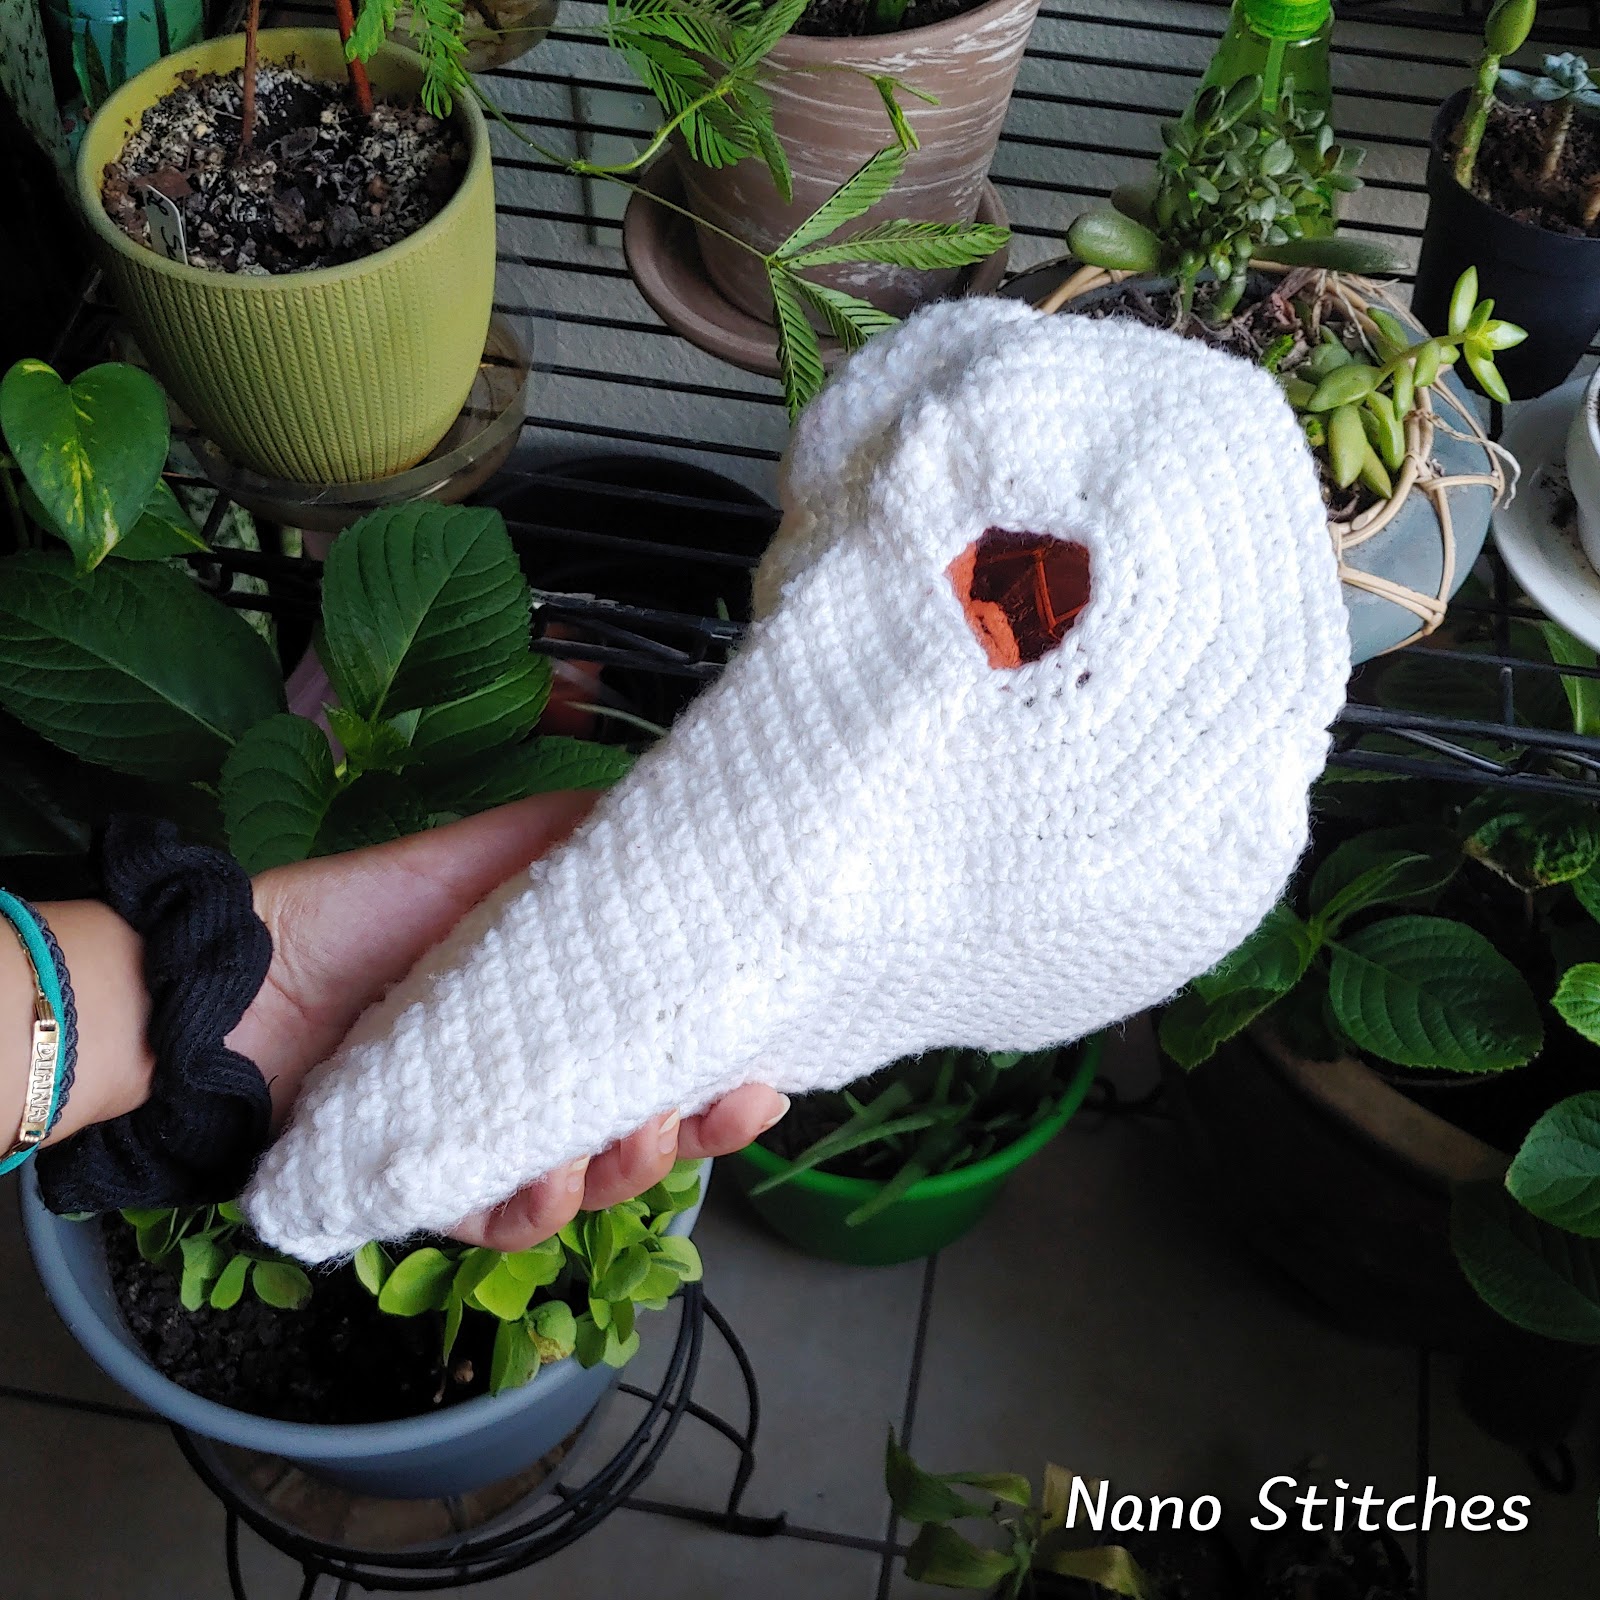
EYE DETAILS
Reattach the yarn to the inside of one of the eyes, ch 1, and (3 sc, 1 sc inc) X5 on the inner edge of the eye. Since this stitch count may not be exact, sc 1-3 at the end if needed. Fasten off and repeat this process for the other eye.
LENS POUCH:
Ch 24, sl st to the first stitch to form a ring. (3 sc, 1 sc inc) X6.
Sl st to the first sc, ch 1, (4 sc, 1 sc inc) X6, sl st to the first sc.

Sew the outer edge of this small doughnut
to the inside of the mask, right behind the
eye holes, this will create a pouch to hold
the sunglass lens.
Alternatively, you can skip making the lens pouch if you glue the lenses directly to the inside of the mask.
HEAD BAND
Attach yarn to the crease at the side of the mask, around the height of the cheekbone. Chain 55-65 depending on personal head size. Sl st to the crease on the other side of the mask and sl st back on each chain to make it thicker and sturdier.
You’re technically done! But you’ll notice that the mask itself is pretty flimsy, which is why I blocked it by diluting glue in a bowl with water and damping the yarn with this mixture. The mask has to have this shape when it dries, so you’ll need something to prop it open and upright, I used a tupperware lid that I could later wash.
It’ll take a couple of hours to dry out but this step is so worth it to help the mask keep its signature shape ♥
Thank you so much for choosing my pattern!
I’D LOVE TO SEE YOUR PROJECTS! IF YOU HAVE PROGRESS PICTURES OR WANT TO SHARE YOUR FINISHED PROJECT PLEASE TAG THE GRUMPY GRANNY ON SOCIAL MEDIA
You may sell your product providing pattern credit to The Grumpy Granny on Twitch, TikTok, Instagram, Etsy, Facebook, Pinterest, Ravelry: @the.grumpy.granny or any other social media in which you advertise. The pattern itself shall not be copied. If you sell the items you must use your own pictures for advertising. If you need assistance during the process or find someone else selling my pattern feel free to contact me on social media or email me at la.grumpy.granny@gmail.com