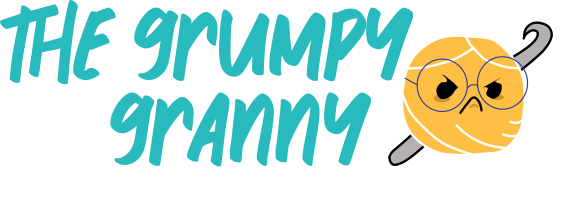
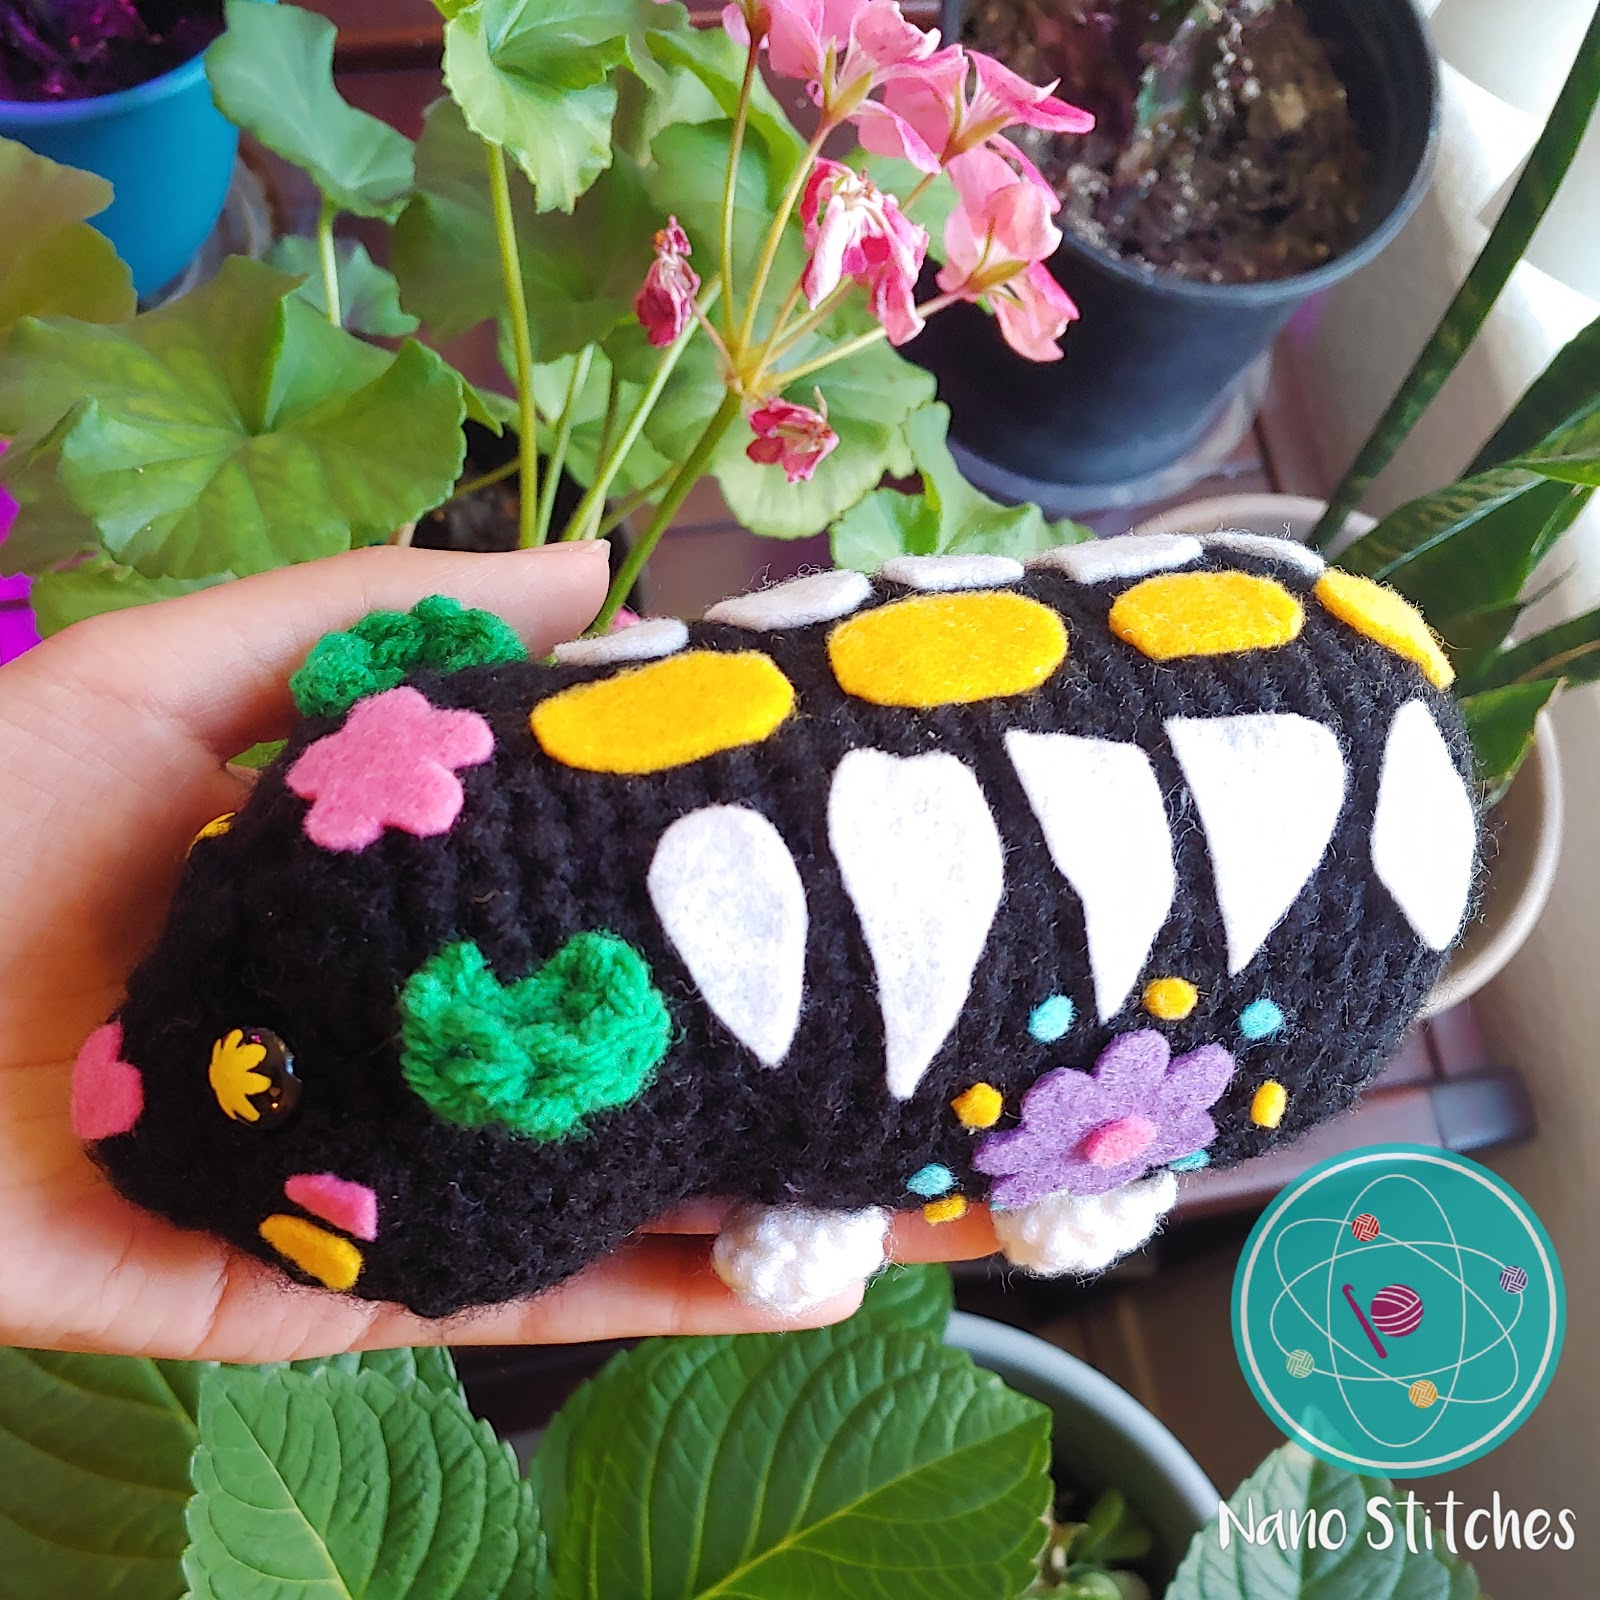
This is a crochet piece very close to my heart ♥. The Day of the Dead is by far the most beautiful mexican tradition, and it’s one that I’m very proud of with respect to my heritage.
I chose not to talk about it before, but a couple of months ago we lost Mumu, one of our piggies. She’d been with us for 5 years but we were never sure of how old she was because she was a rescue. She was malnourished, lived on bedding of wooden shavings, and had never had timothy hay in her life (guinea pig owners know why these last two are a BIG deal). We tried to give her the happiest life possible, but still, everything comes to an end.
For a month after she left, I couldn’t create anything. It just felt wrong, somehow. But my last two designs have been made with her and the piggies we have loved in the past in mind. The Cavy Catrina in specific will be part of our Day of the Dead altar. If I take pictures, they’re going to be on Instagram ♥
If you actually read this I thank you very much. Let us crochet:
The ad-free and printable version of this pattern can be found here.
Abbreviations:
- MC: Magic circle
- Ch: Chain
- Sc: Single crochet
- Sc inc: Single crochet increment (2 sc in the same stitch)
- Hdc: Half-double crochet
- Hdc inc: Half-double crochet (2 hdc in the same stitch)
- Sc dec: Single crochet decrease
- Sl st: Slip stitch
Materials:
- 4.5mm Crochet Hook
- 12mm Safety eyes and their backings
- 2 oz Black yarn (Red Hearts Super Saver in “Black”)
- <3 ft Green yarn (Crafter’s Secret in “Jellybean”)
- <1oz White yarn (Red Hearts Super Saver in “White”)
- Various colors of felt. Used: Bright pink, Gold, White, Turquoise, and Violet.
- Yellow paint. Nail polish recommended.
- 1oz Fiber fill stuffing
- Fabric glue (Liquid Stitch, Original)
- Yarn needle (metal recommended)
- Scissors
PATTERN
Starting with black yarn
- Round 1: MC, sc 7 (7)
- Round 2: 4 sc inc, 3sc (11)
- Round 3: 5 sc inc, 6sc (16)
- Round 4: sc around (16)
- Round 5: 10 hdc inc, 6 sc (26)
- Round 6: sc around (26)
- Round 7: 3 sc, 2 hdc inc, 4 sc, 2 sc inc, 4 sc, 2 hdc inc, 9 sc (32)
- Round 8-10: sc around (3 rounds) (32)
- Round 11: (3 sc, 1sc dec) X2, 6 sc, (1sc dec, 3 sc) X3, 1 sc (27)
- Round 12: 1 sc dec, 21 sc, 2 sc dec (24) sl st and fasten off
- Round 13: sc around (24)
- Round 14: (3 sc, 1 sc inc) X6 (30)
- Round 15: 2 sc inc, 28 sc (32)
- Round 16-18: sc around (3 rounds) (32)
Read the “SAFETY EYES” section after completing round 18.
- Round 19 and 25: sc around (7 rounds) (32)
- Round 26: (7 sc, 1 sc inc) X4 (36)
- Round 27-31: sc all around (5 rounds) (36)
- Round 32: (2 sc, 1 sc dec, 2 sc dec) X6 (30)
- Round 33: (3 sc, 1 sc dec) X6 (24), start stuffing
- Round 34: (1 sc, 1 sc dec, 1 sc dec) X6 (18)
- Round 35: (1 sc, 1 sc dec) X6 (12)
- Round 36: 6 sc dec, sl st into the next stitch (6). Fasten off, leaving a yarn tail about 5 inches long and use your yarn needle to go though the outside loop of these remaining stitches, then pull the yarn to close the opening.
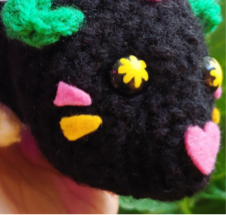
SAFETY EYES
READ ENTIRE SECTION BEFORE PLACING EYE BACKINGS:
Using the yellow paint, draw an asterisk on each safety eye (*), let dry before handling.
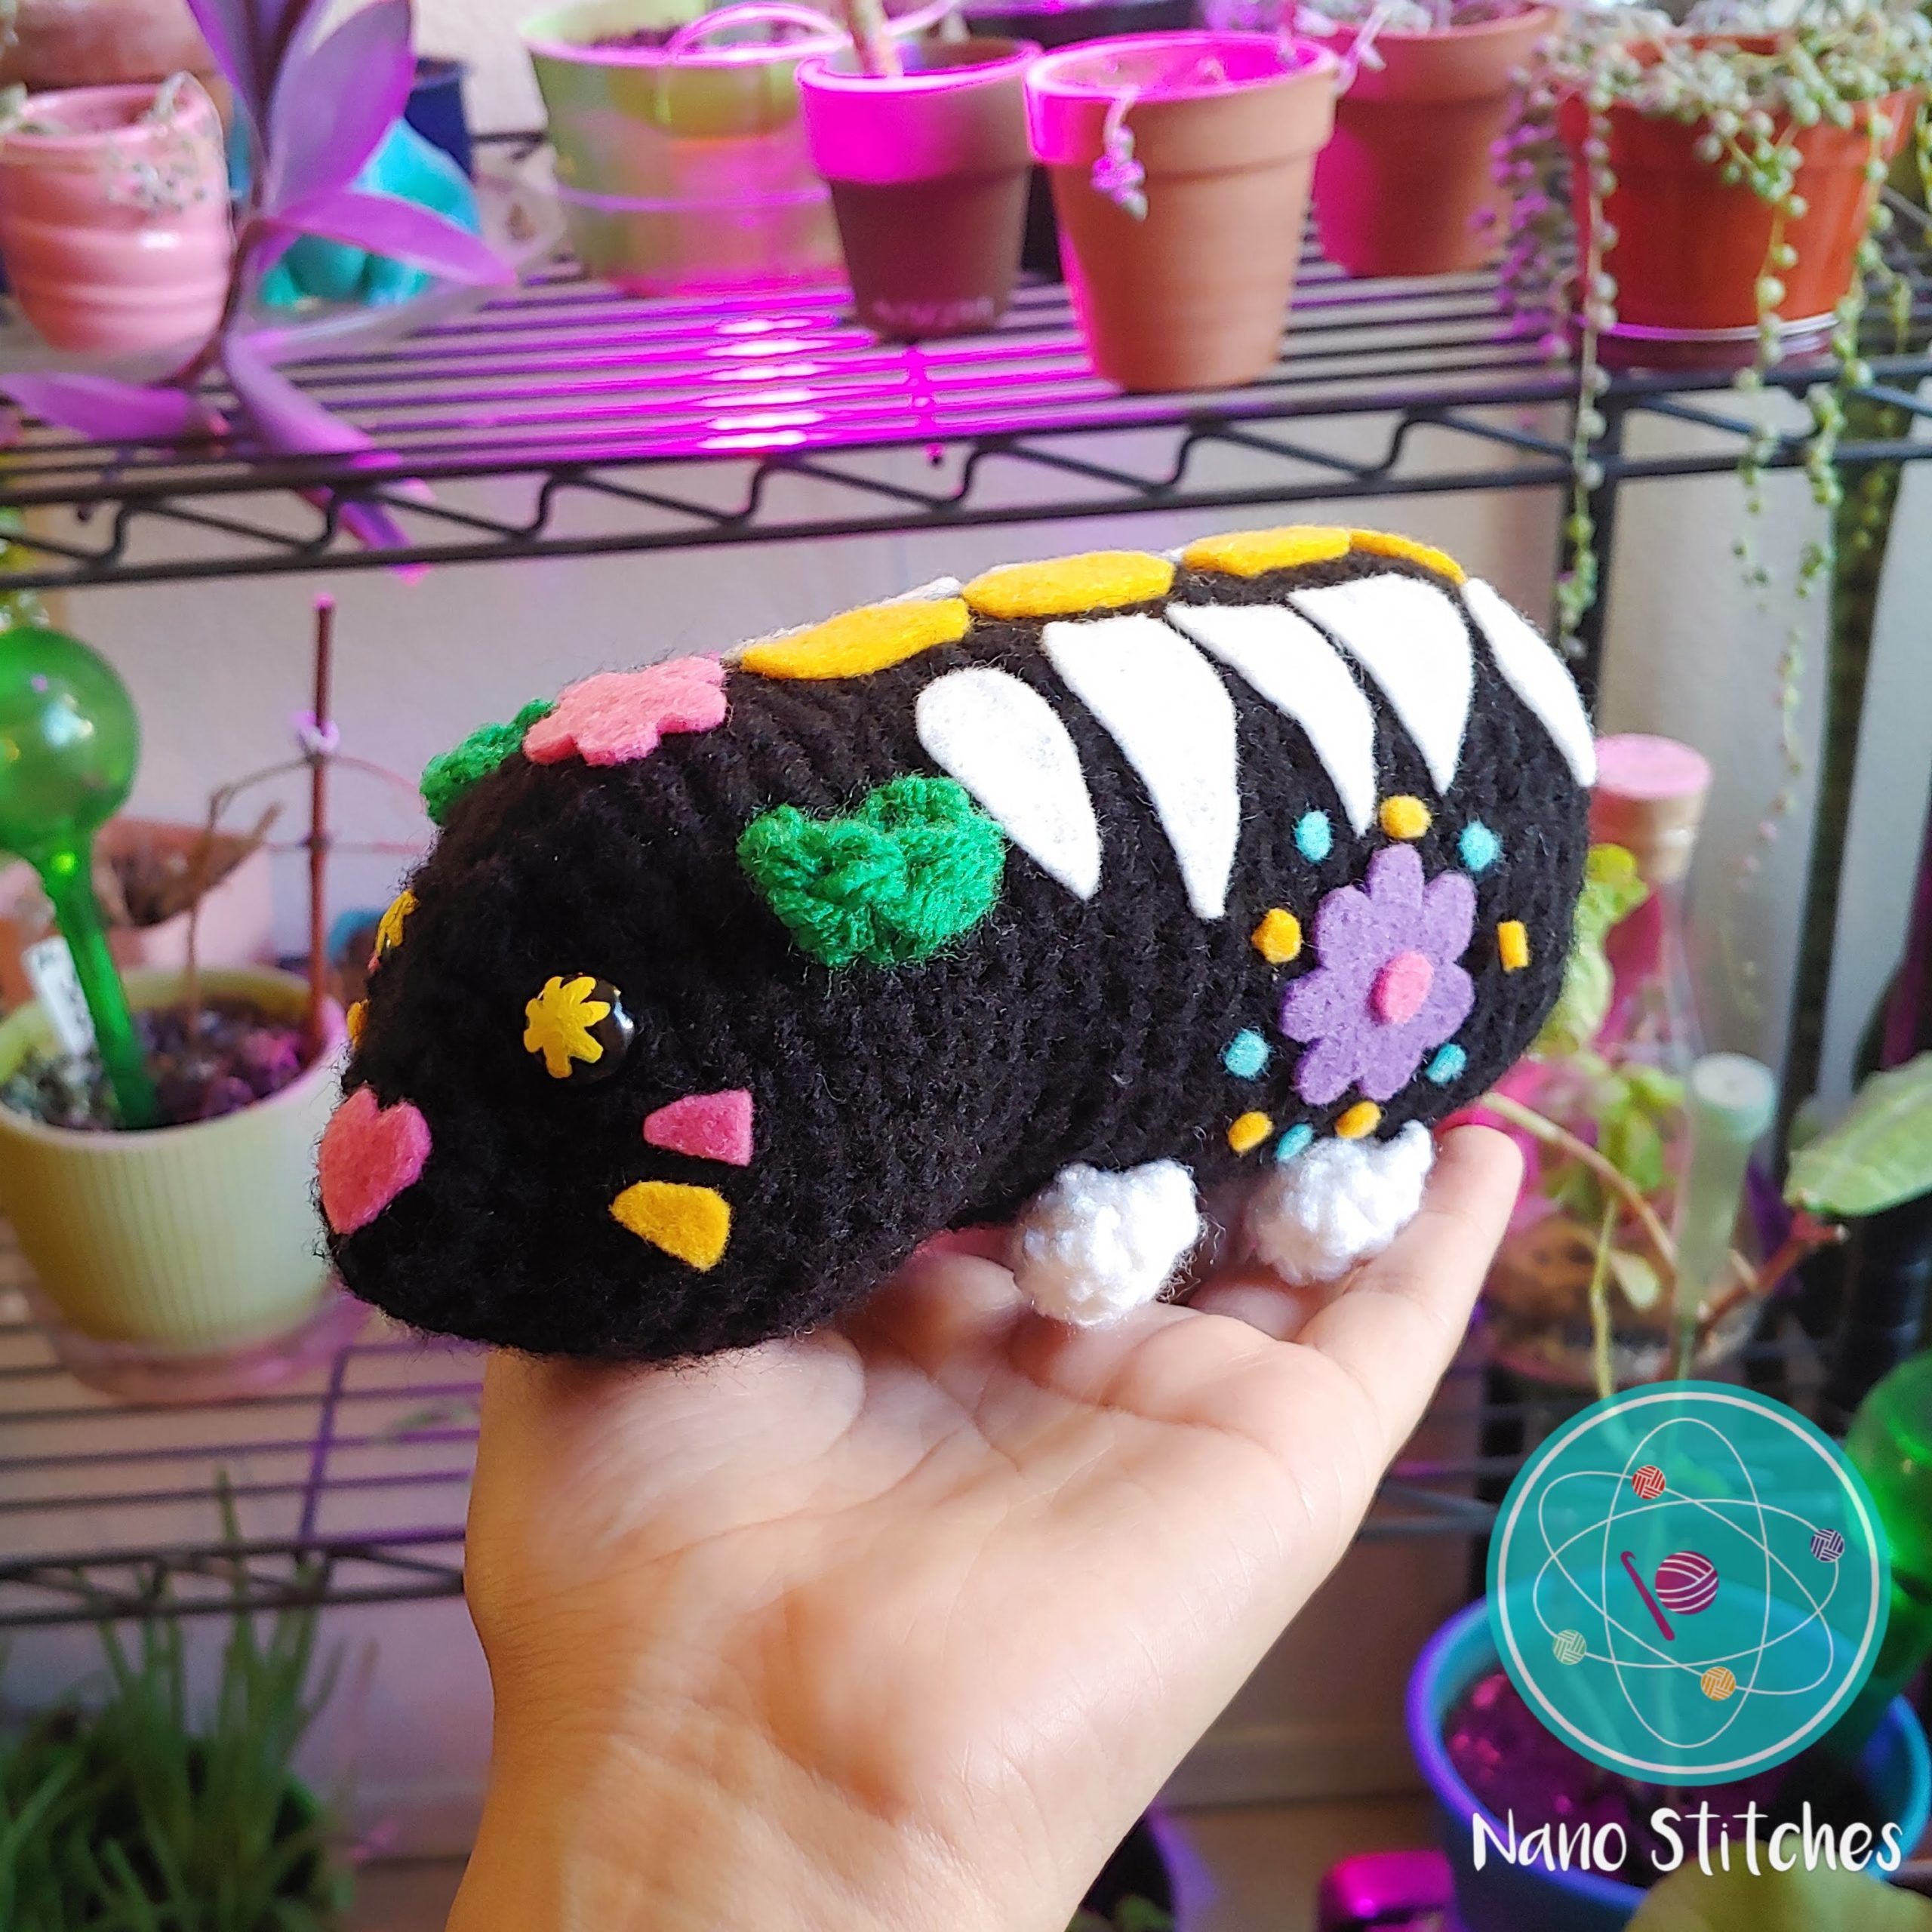
After completing Round 18, stuff your work, identify Round 5, and place the first safety eye between hdc inc #3 and #4, place the second safety eye between hdc inc #7 and #8. Remove both safety eyes, notice that they have shifted the stitches and each left a noticeable hole.
Follow the tutorial below to sculpt the eye indents:
Repeat that process two or three more times, slightly pulling the yarn to secure the eye sculpting. After hiding the yarn ends, place the safety eyes back in their place, remove the stuffing, and secure the safety eye’s backings.
EARS
Using green yarn. Repeat twice to get two ears:
- Ch 4, skip the first chain and 1 sc in the second chain, 3 dc into the third chain, and 1 sc into the last chain. Chain 1 and fasten off, leave a 5 inch long tail for sewing. Pin the ears to the top of the head and once you like the alignment, sew them on.
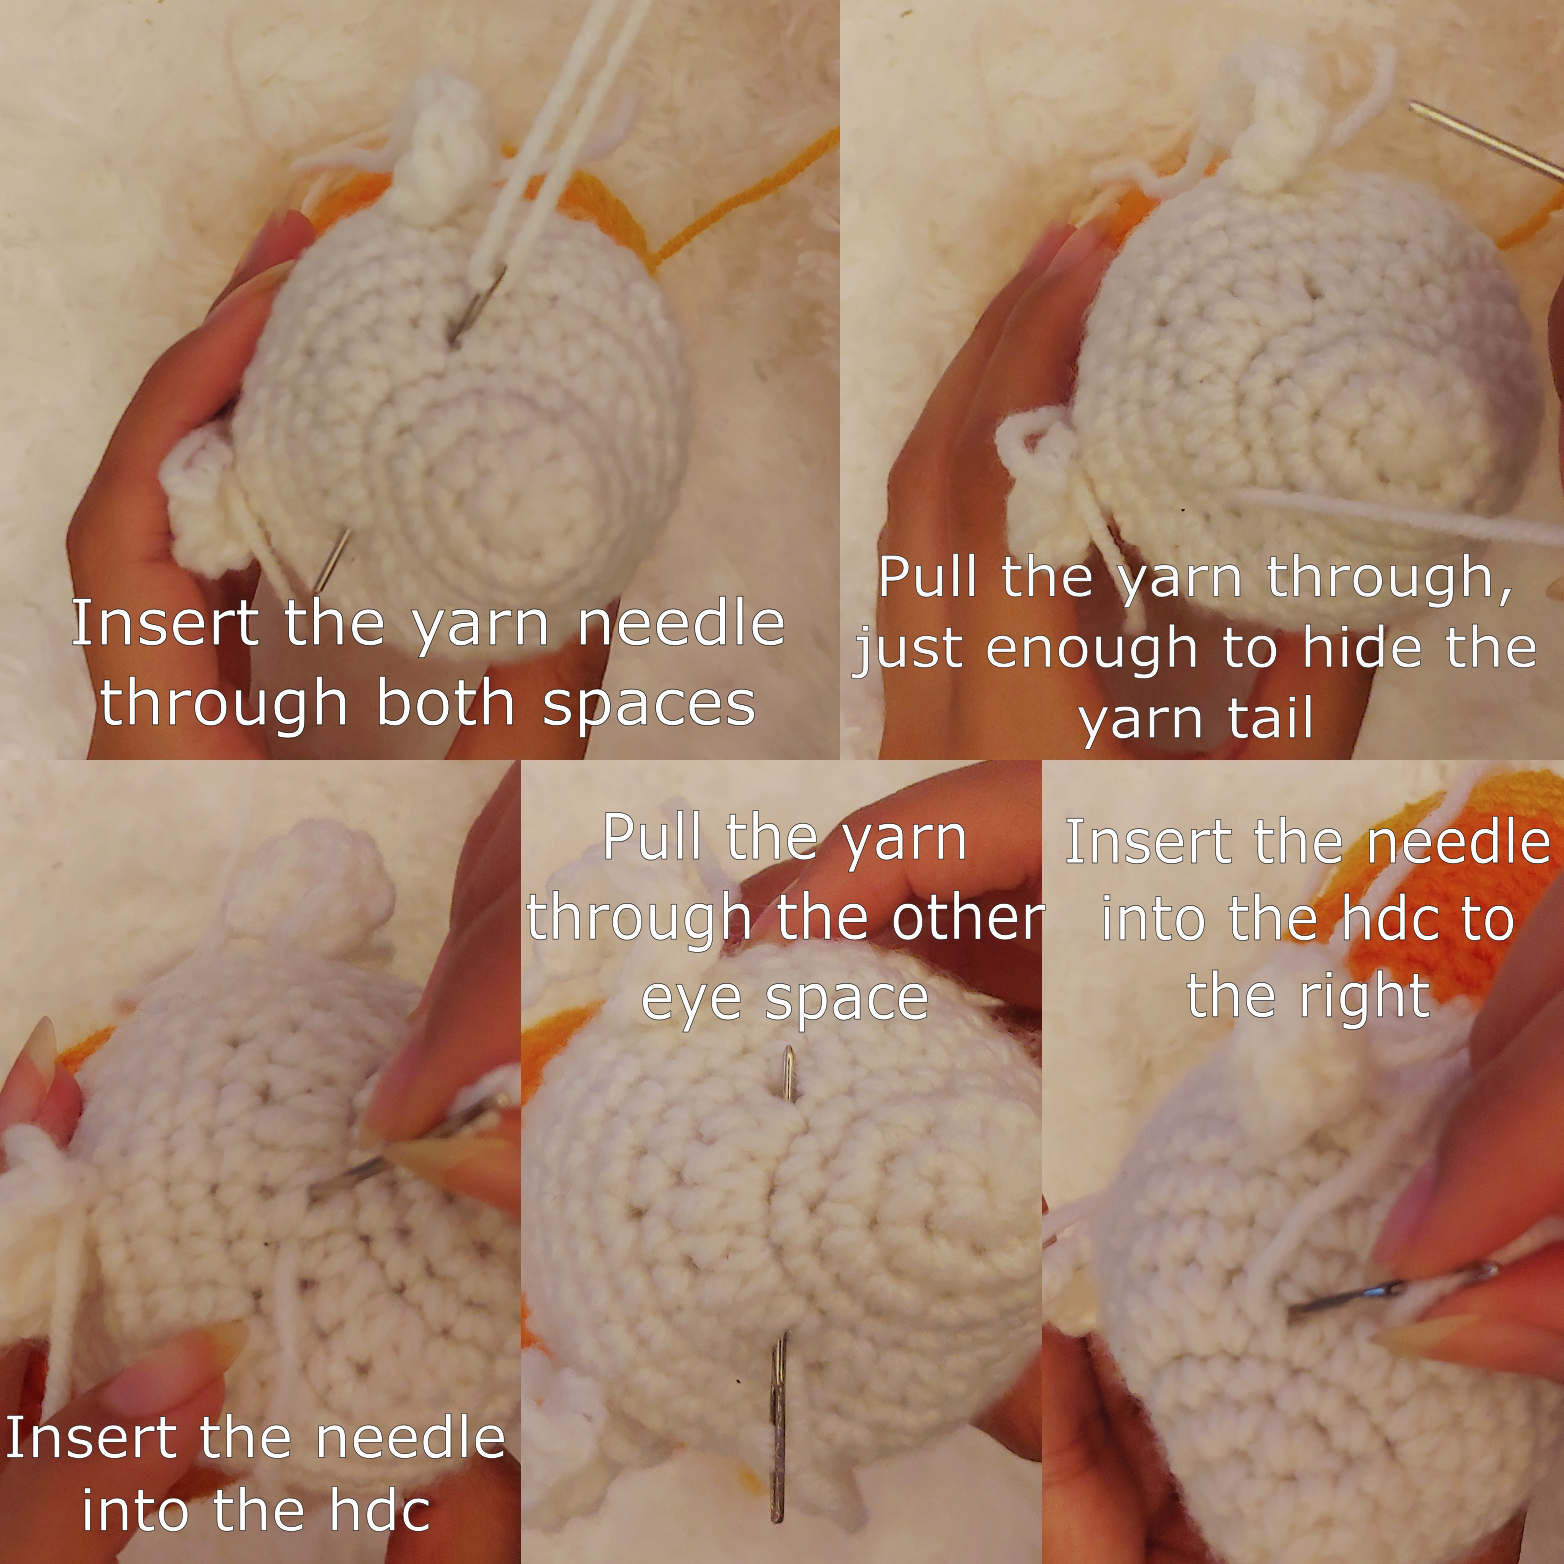
SNOUT
Cut out a small and slightly elongated heart and glue it at the tip of the nose.
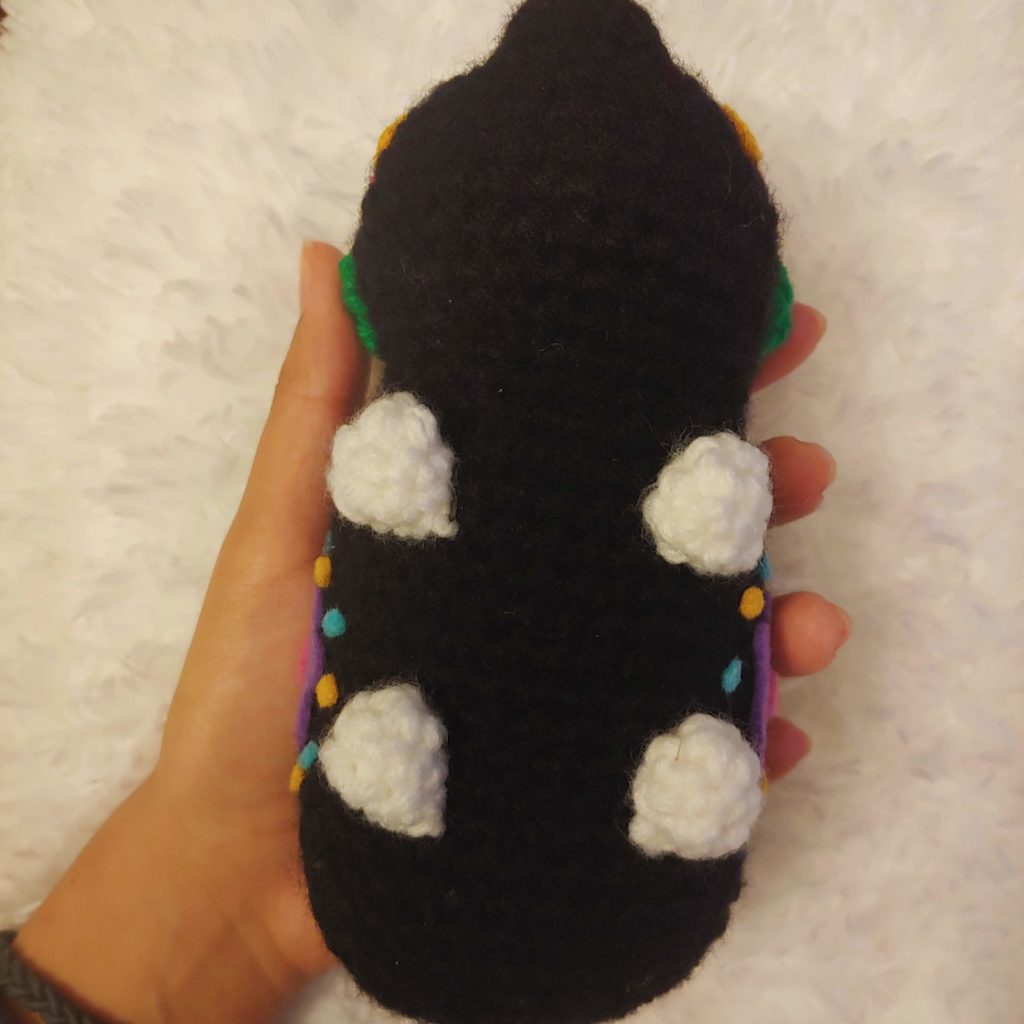
PAWS
Using white yarn. Repeat 4 times for a total of 4 paws:
- Round 1: MC, sc 6 inside (6)
- Round 2 and 3: Sc 6 around (2 rounds) (6), fasten off and leave a
4 inch tail for sewing
Place the paws in place:
Suggested: front paws between rounds 16 and 17, 4 stitches apart, and back paws between rounds 24 and 25, 4 stitches apart.
FELT APPLICATIONS
- 4 Golden squares with rounded out corners for the “spine”.
- 5 pairs of White “ribs”. These do not mean to be anatomically accurate, but cartoonish.
- 1 Pink 5-petaled flower for the top of the head.
- 2 Violet flowers, one for each side.
- 10 Golden dots.
- 10 Turquoise dots.
- 2 small Pink circles for the center of the Violet flowers.
- 2 Golden triangles with rounded out corners and 2 Pink ones, for the “whiskers”.

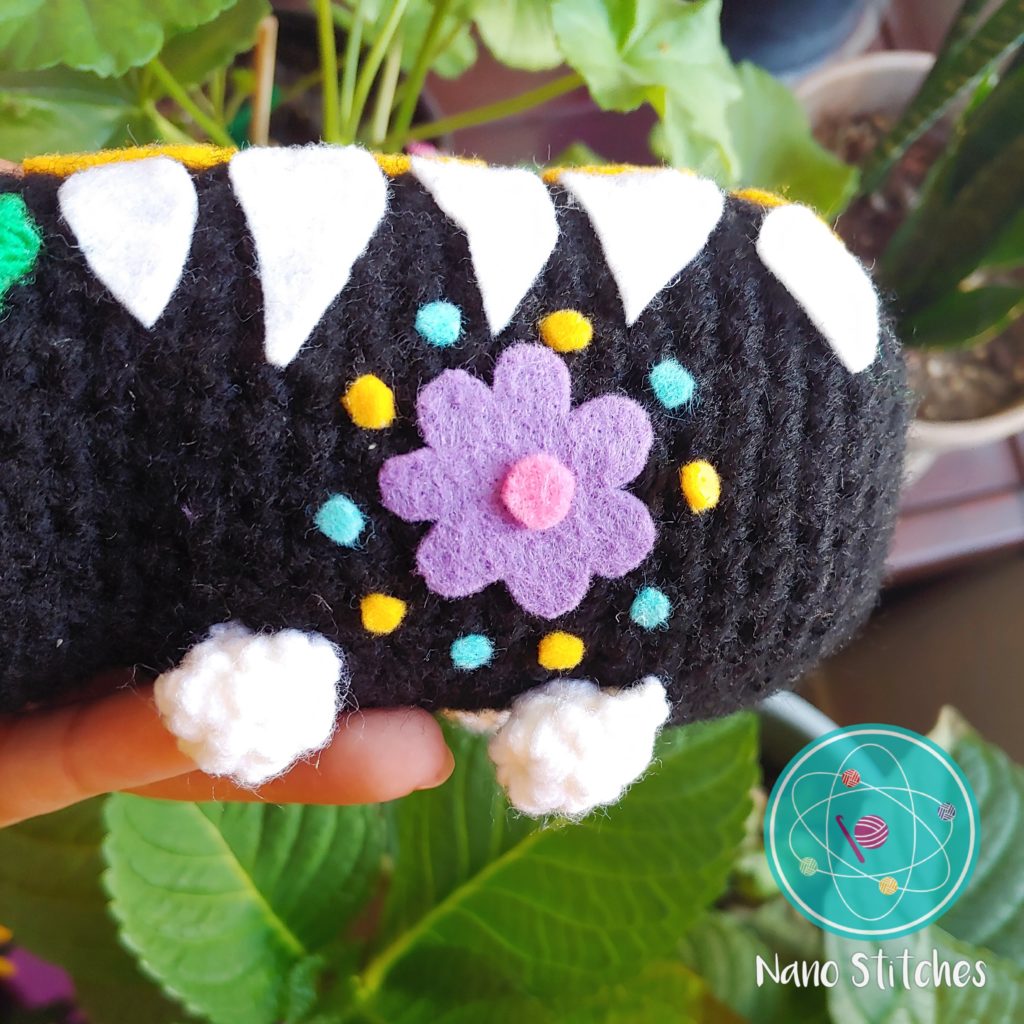
Arrange 5 Golden dots and 5 Turquoise dots around each side flower, alternating the color.
Glue all the felt pieces in place using fabric glue (hot glue might damage the felt!)
And you’re done! I just showed you how to make my exact design, but if you want to decorate it differently, invert the colors, or make something representative of your piggie, go ahead! ♥
I’D LOVE TO SEE YOUR PROJECTS! IF YOU HAVE PROGRESS PICTURES OR WANT TO SHARE YOUR FINISHED PROJECT PLEASE TAG THE GRUMPY GRANNY ON SOCIAL MEDIA
You may sell your product providing pattern credit to The Grumpy Granny on Twitch, TikTok, Instagram, Etsy, Facebook, Pinterest, Ravelry: @the.grumpy.granny or any other social media in which you advertise. The pattern itself shall not be copied. If you sell the items you must use your own pictures for advertising. If you need assistance during the process or find someone else selling my pattern feel free to contact me on social media or email me at la.grumpy.granny@gmail.com