

Welcome to the Amigurumi Builder series, your go-to destination for crafting adorable crochet creations! Designed to seamlessly complement the Classic Doll Base pattern, this series empowers you to bring your imaginative visions to life with ease.
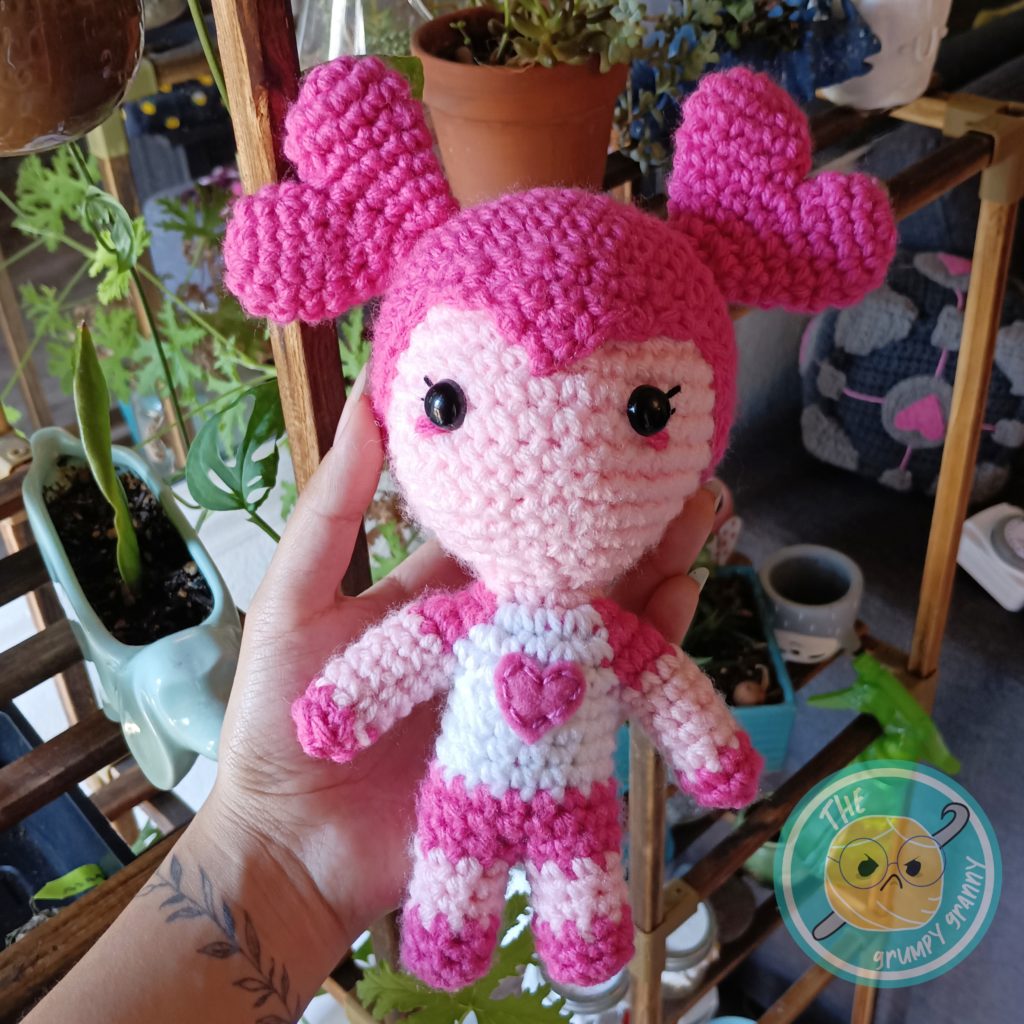
The widow’s peak is a captivating hairstyle brought to life through the Amigurumi Builder Series. Dive into the art of crochet with this free pattern designed to add a touch of sophistication to your amigurumi creations.
Unlock endless possibilities as you explore the art of crochet and dive into the world of amigurumi design. Whether you’re a seasoned crafter or just starting out, our step-by-step tutorials and versatile patterns make it easy to create any amigurumi you desire.
So, grab your crochet hooks and let’s embark on a journey of creativity and craftsmanship. Let’s get to crocheting and bring your amigurumi dreams to life, one stitch at a time!
Abbreviations:
- MC: Magic circle
- Ch: Chain
- Sc: Single Crochet
- Sl st: Slip Stitch
- Sc dec: Single Crochet Decrease
- Sc inc: Single Crochet Increase
- (xx): Numbers in bold mean stitch count at the end of each round
Gauge:
In a 1 inch by 1 inch square of stitches there should be 4sc and 4 rows of sc.
Materials Needed:
- 4.50mm Crochet Hook
- Medium Weight Yarn
- Scissors
- Yarn needle (metal recommended)
- A stitch marker (I use colorful paperclips)
PATTERN
Worked in-the-round:
- Round 1: MC, 6 sc (6) set your marker
- Round 2: 6 sc inc (12)
- Round 3: (1sc, 1 sc inc) x6 (18)
- Round 4: (1sc, 1 sc inc, 1sc) x6 (24)
- Round 5: (3sc, 1 sc inc) x6 (30)
- Round 6: (2sc, 1 sc inc, 2sc) x6 (36)
- Round 7-14: Sc around. Re-place your stitch marker after completing each row. (8 rounds)
You’ll not be working ROWS into this same piece, this will create the “triangle” part of the widow’s peak:
- Round/Row 15: Sc 10 (10)
- Row 16: Ch 1, turn your work, skip the first stitch, 7 sc across, 1 sc dec (8)
- Row 17: Ch 1, turn your work, skip the first stitch, 5 sc across, 1 sc dec (6)
- Row 18: Ch 1, turn your work, skip the first stitch, 3 sc across, 1 sc dec (4)
- Row 19: Ch 1, turn your work, skip the first stitch, 1 sc across, 1 sc dec (2)
- Row 20: Ch 1, turn your work, skip the first stitch, 1 sc (1). Ch 1 and fasten off, leaving a 15 inch long tail for sewing.
ASSEMBLING
This should be placed as a “wig-cap” over the already stuffed amigurumi. For better reference of what the final piece will look like, sew to the amigurumi AFTER the body is done.
Using a yarn needle sew every outer loop of the Widow’s Peak cap to the amigurumis head. The back of the hairline should almost touch the amigurumi’s neck. Pay special attention to the tip of the peak and slightly stretch it forward to keep its angle sharp.
Thank you so much for choosing my pattern!
If you liked this design please consider following our Twitch Streams
I’D LOVE TO SEE YOUR PROJECTS! IF YOU HAVE PROGRESS PICTURES OR WANT TO SHARE YOUR FINISHED PROJECT PLEASE TAG THE GRUMPY GRANNY ON SOCIAL MEDIA
You may sell your product providing pattern credit to The Grumpy Granny on Twitch, TikTok, Instagram, Etsy, Facebook, Pinterest, Ravelry: @the.grumpy.granny or any other social media in which you advertise. The pattern itself shall not be copied. If you sell the items you must use your own pictures for advertising. If you need assistance during the process, if someone else is selling my pattern, or you just want to say hi, feel free to contact me on social media or email me at la.grumpy.granny@gmail.com